Setting up Pay in Corpay One
With Pay, Corpay One automatically pays the invoices that have been added to your company account, on the specified due date, or on the payment date of your choice. Pay is automatically turned on in your company account. To get started with Pay, the following steps must be completed.
- Company Verification - Specify business owners and upload information. Keepers can do this for you, as we have already obtained documentation in connection with the start-up at Keepers.
- Activation of MFA (multi-factor authentication) - The user/users who are making payments must activate MFA. All other users and approvers should not do this. This can advantageously be done via the mobile phone by scanning a QR code. Have your passport or driver's license ready before you begin. Activation takes approx. five minutes to complete.
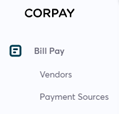
- Add payment method / bank - Select Bill Pay and Payment Sources. Subsequently, a bank is selected, and from here the flow will depend on which bank you have.
Review of all three steps with the customer takes 15 min.
COMPANY
VERIFICATION
Company
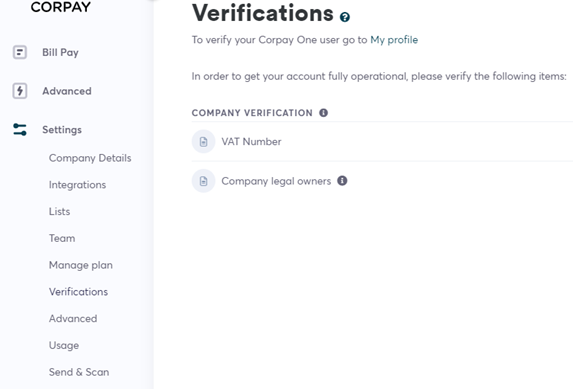
verification can only be done by an administrator.
Go to Settings, and choose Verifications.
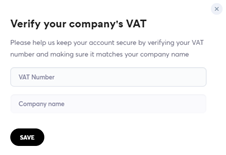
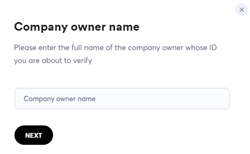
Enter Company registration number and the company owner name. Click Save
Upload documentation (ID) of the company owners. You can upload passport or driving license. Keepers have usually already obtained the customers identification paper via CLA reply for the use of risk assessment cf. money laundering law. Write to support@keepers.nu or ask Kristina, if we earlier on have obtained your documentation.

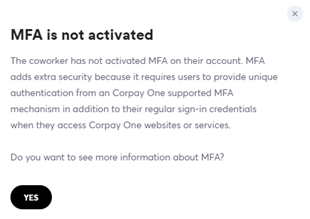
Click on the owners name to see if the Multi Factor Authentication is activated. IF it is not activated, the message below will appear. This verification kan only be completed of the person himself/herself. See how in the following.
Activation of Multi Factor Authentication
Go to My profile og choose Verifications

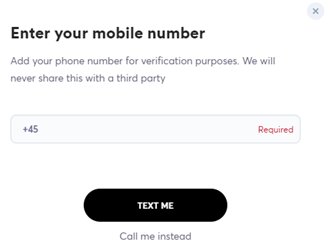
Click on Mobile, and enter your phone number. Click Text me or Call me instead.
You will then receive a verifications code. Enter the code and click Next.
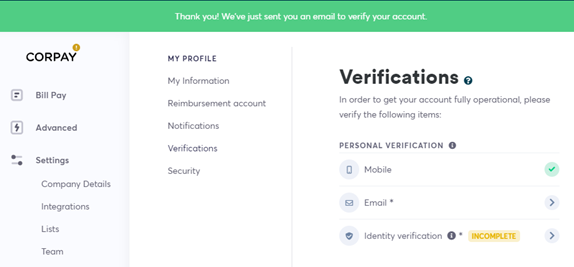
Click on Email (There will be a green message on the top of the screen, that tells you an Email has been sent to you.
The mail can be seen below. Click on the link Verify my account.
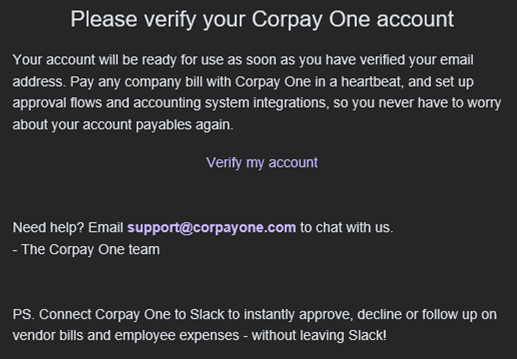
The link will lead you to this side, and you have kow verified your email.

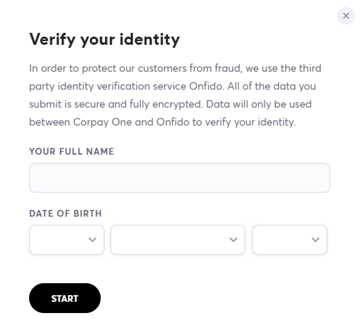
Go to My Profile and Verifications to continue and to complete the last steps of the personal verification.
Enter your full name as well as birthdate and click start.
Choose one of the below methods to verify your identity.
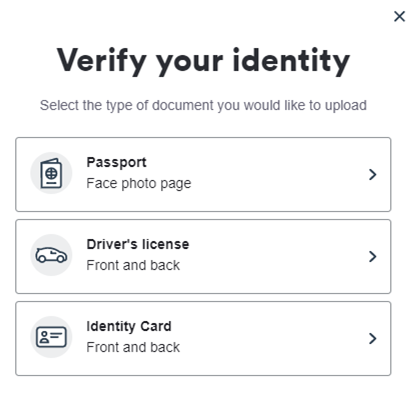
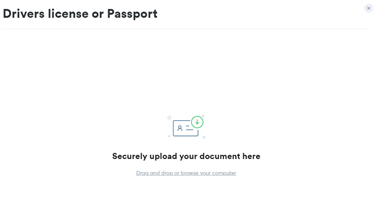
The passport has been chosen here. You can choose to continue the process via the phone.
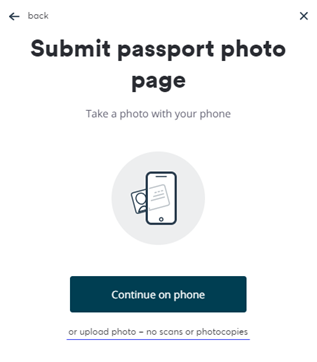
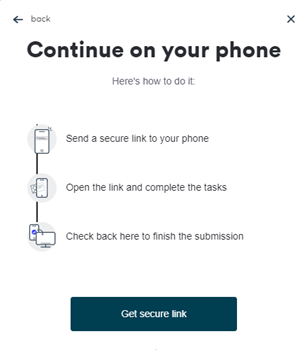
Click Get secure link to continue on the phone. You will now see a QR-code on your computer screen. Scan the QR code with your phone.
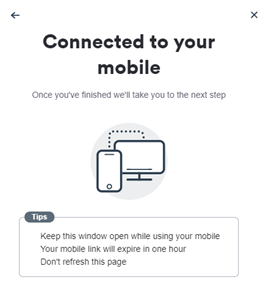
When you have scanned the code, the picture below will be appear on your computer screen. Keep this window open and do not update the site, while you use the phone. The mobile link will expire in one hour.
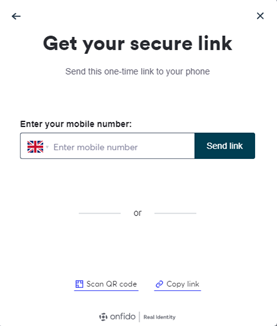
FYI. If the QR code doesn't work, you can receive the link via SMS. Enter number and press "Send link" (remember to choose the correct nationality).

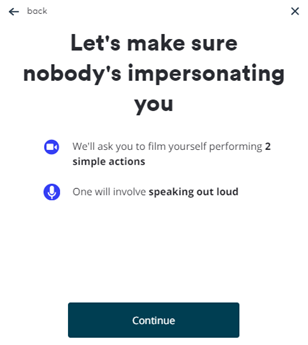
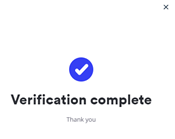
Once you have uploaded the ID, you need to complete two more steps, 1) voice and 2) video recording.
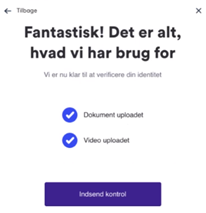
Når
du har gennemført disse trin, vil du se meddelelsen nedenfor. Tryk nu Indsend
kontrol.
Add Payment Method / Bank
Add Payment source. Go to Bill Pay and choose Payment Sources.

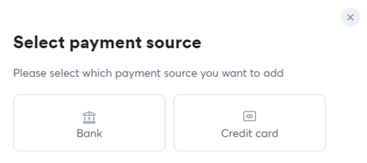
Choose Bank. Vælg Bank. Then you will see an overview of all the banks that the system supports.
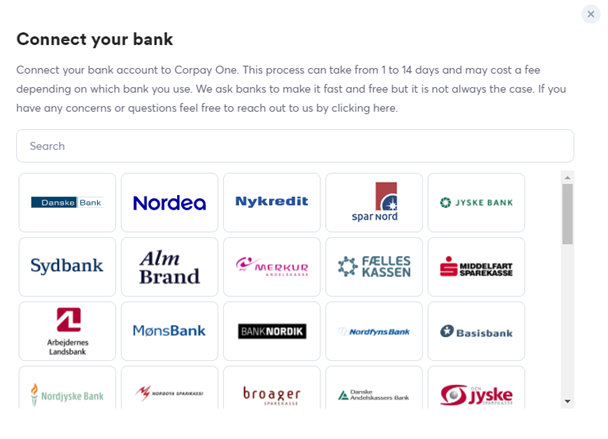
Select bank, enter account name, reg. number and account number and press Connect. Find this information in e-conomic by going to All settings and master data.
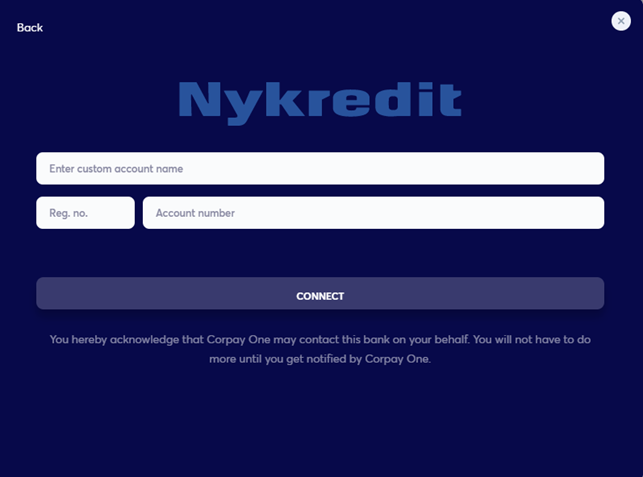
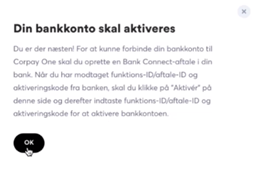
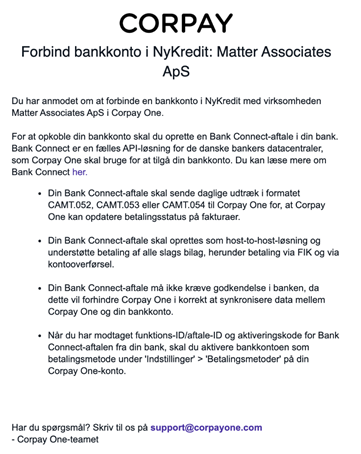
From here, the process is different, depending on which bank you have. You will initially receive the email below from Corpay with information on what your bank connect agreement should contain. Then contact the bank to get it started.